Tie-Dye/Graffiti Beach Towels (a.k.a. my attempt to be a Pinterest Mom)

We are having a splash park birthday party for Skywalker and Fozzie in a couple of weeks, and for some reason “psychedelic beach” is the theme that’s evolved for it. In an attempt to avoid spending $20 per attending child on bags of crap (half of which invariably end up in my basement because I made up too many goodie bags and/or forgot where I hid the contents, only to find them the week after the party — pirate rings? princess beads? stale chocolate*? anyone??), I thought it would be fun to make tie-dyed towels as party favors instead.
I bought the cheapest white bath towels I could find (just under $2 each), two multicolor tie-dye kits from Wal-mart, and a couple of buckets for the “base” colors: lime green and purple. For those two colors I bought the large packets of powder. Since I had about 40 towels to dye in the middle of a sweltering Georgia afternoon, I didn’t really have a “process,” so much as a slightly contained explosion of sweat, profanity and color.
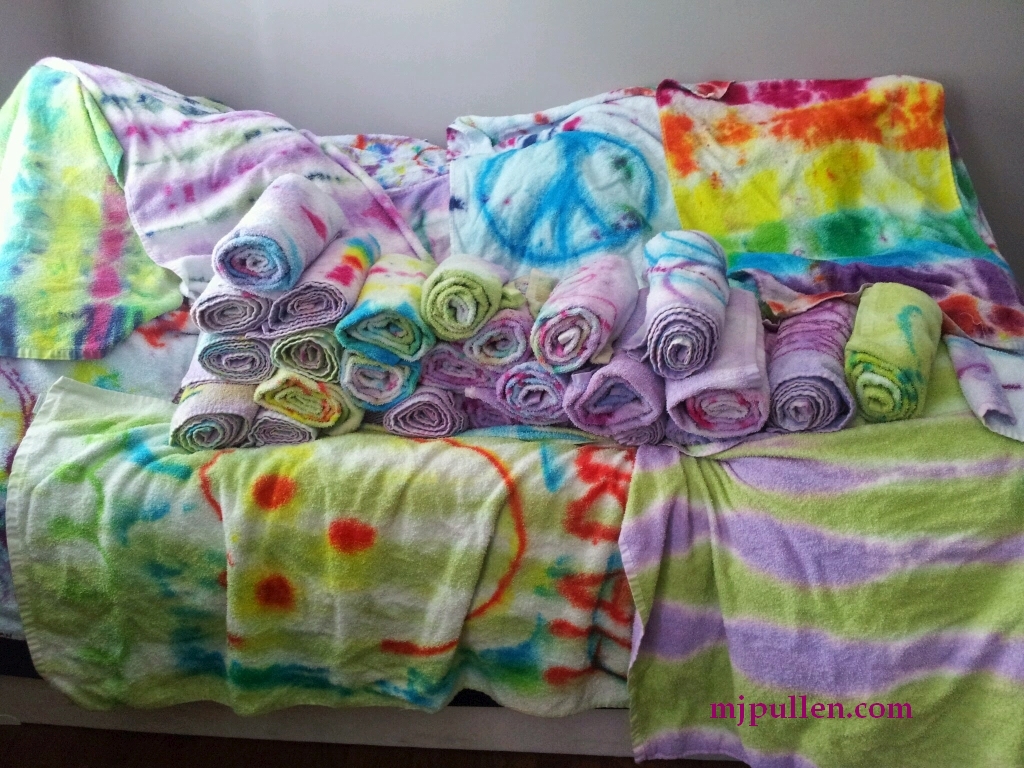
Still, I think for the most part they came out kind of cute – and the cheap bath towel is a perfect kid-sized beach towel. This would also be fun for a college dorm or teenager’s sheet set. For 40+ towels, it took me a total of about three hours to do this project, not counting rinse and dry time.
Naturally, I was not organized enough to take pictures at each stage of the project, and since I did each towel a little differently, it probably wouldn’t have helped much anyway. If you decide to re-create my insane little project, here a few things I learned.
- The hardest part of tie-dying is the prep work – getting the dyes made up, making the work space, finding a place to hang 40 towels in your front yard.
- If you fail to find a place to hang 40 dyed towels in your front yard, and opt instead to put them on top of one another while they are still wet, the dye will spread from one towel to the next like gonorrhea. Also, no matter what the weather forecast is, if you dye 40 towels outdoors, it absolutely will rain right in the middle. Just FYI. Lucky for me I was going for the splotchy/bleedy look anyway.
- Also, you are supposed to wash the towels without detergent and dry them without fabric softener to remove any chemicals from the manufacturer before dying. I didn’t do this step, because I always wait until the last minute to read directions, and mine turned out fine. But you’ve been WARNED!
- Make sure you have all dyes made up (in buckets and/or bottles) BEFORE inviting an energetic five and almost-three year old to help you. You do NOT want two active little boys standing around bored with bottles of dye. Trust me.
- The little plastic gloves that come with the tie-dye are useless. You might want to go with those big yellow ones instead. And a full-body wetsuit.
- I can’t prove this, but you should be aware that dye *might* attract bees.
- Okay! So, the best way to tie-dye a towel is:
- Fold the towel accordion-style (from either end, depending on the way you want the stripes to run) in sections of about 2-4 inches wide. My absolute favorite thing about tie-dye is that no precision is required whatsoever.
- Once it’s folded, put a rubber band near either end and somewhere in the middle to hold the folds in place. You can do more rubber bands if you want more tiny white streaks.
- To dip in dye: Fold or curl the accordion towel in a little spiral (so you can fit it into the bucket) and dip it lengthwise – one side of the accordion — about halfway into the dye. If you want white or light space between the stripes, dip it a little less than halfway, if you want the colors to overlap, dip a little more.
- Let the towel drip into the dye bucket for a few seconds, then turn it upside down and dip the other half in the other color. The dye will run toward the middle once you remove it, so you may want to leave a slightly bigger gap between the colors than you want in the result.
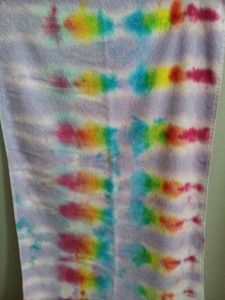
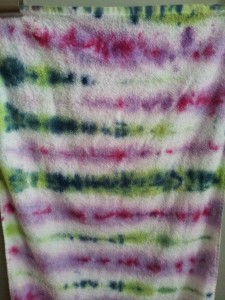
- Option: instead of dipping the towel in a bucket of dye, you can use the bottles of dye from a kit to get the same effect but with more colors. It takes longer, but you have more control. After step #2, just apply the dye from the bottles width-wise across the ridges of the accordion on one side of the towel. You can do one color this way, or twenty, and you’ll end up with both vertical and horizontal stripes/patches of color on the finished towel. I also did a few where I dipped them and then added streaks with the bottles of color. (See pictures for some examples).

I dipped half in purple and streaked it with fuchsia, the other half in green and streaked with blue. I left a bigger gap of white space on this one – it’s one of my favorites! - Leave the towel in the accordion shape and set it aside on plastic tarp (or another white towel – the two I used to catch the dye from the others came out kind of cool, too!).
- After some of the excess water has evaporated, you can remove the rubber bands and add a design with the bottle dyes (I did swirls and hearts and peace signs and smiley faces — I’m complex like that), or for simple tie-dye, hang the towel up to dry a bit and set. I’d love to give you an exact time: mine dried for anywhere from half an hour to two hours depending on where they were in the order of creation. Most were still damp or wet when I rinsed them.
- Rinse towels on cold — with or without salt, according to package directions — grouping similar color combinations together, and tumble dry. Viola!
This method will give you a stripey pattern, which for me worked better than trying to do spirals or circles. However, I should note for the record that I am possibly the least crafty person on the planet — Hubs once had to swoop in an finish a batch of cake balls for me while I sat in a nearby chair and cried about my inadequacy as a woman.
So, if you’re better at this stuff than I am, you can probably get great circles and spirals if you start at two separate corners of the towel and go through the process a couple of times. If you start in the center, you get lots of white space in the middle because there’s so much fabric and the sides are different lengths. Then again, you can just add a spiffy peace sign and all is well.
I don’t know if the kids at our party will love these as much as I loved making them, but they were a ton of fun. Definitely a project I will consider doing again — and the possibilities are endless. You could do theme pictures for a party, team colors, match a bedroom or bathroom…
My fingernails may never be white again…
*Clearly a fictional example. Chocolate never hangs around my house long enough to get stale.
______________________________________________
I’m M.J. (Manda) Pullen, an author and mom in the Atlanta, Georgia area. I blog about writing, publishing, motherhood, health, psychology and whatever else strikes me in the moment. Someday I’ll be a Pinterest mom, or dye trying! Get it, dye? 🙂
If you enjoyed this entry, please follow along or join my Inner Circle monthly email list. At the end of each month I do random drawings with various prizes for list subscribers, the friends who refer them, and everyone who comments on the blogs. Good luck with that!
My current roster of books includes The Marriage Pact series, a trilogy of funny, semi-realistic Contemporary Romance/Women’s Fiction novels. You can find them for all eBook formats and in paperback here.
Sign up for M.J’s Mailing list & read Late for the Holidays FREE! Sign Me Up!